The ‘A chord’ is one of the most used chords in the world of guitar playing. In all styles and genres of music, this chord shows up everywhere, and if you want to learn this chord then look no further.
This lesson will show you how to master the ‘A chord’ on the guitar and 5 other variations of it across the fretboard. You will also learn some tricks and tips that will help you to make these chords sound better, clearer, and sharper.
So, let us start with the most common (traditional) shape of the ‘A Chord’ among guitarists.
How To Play The A Chord On The Guitar
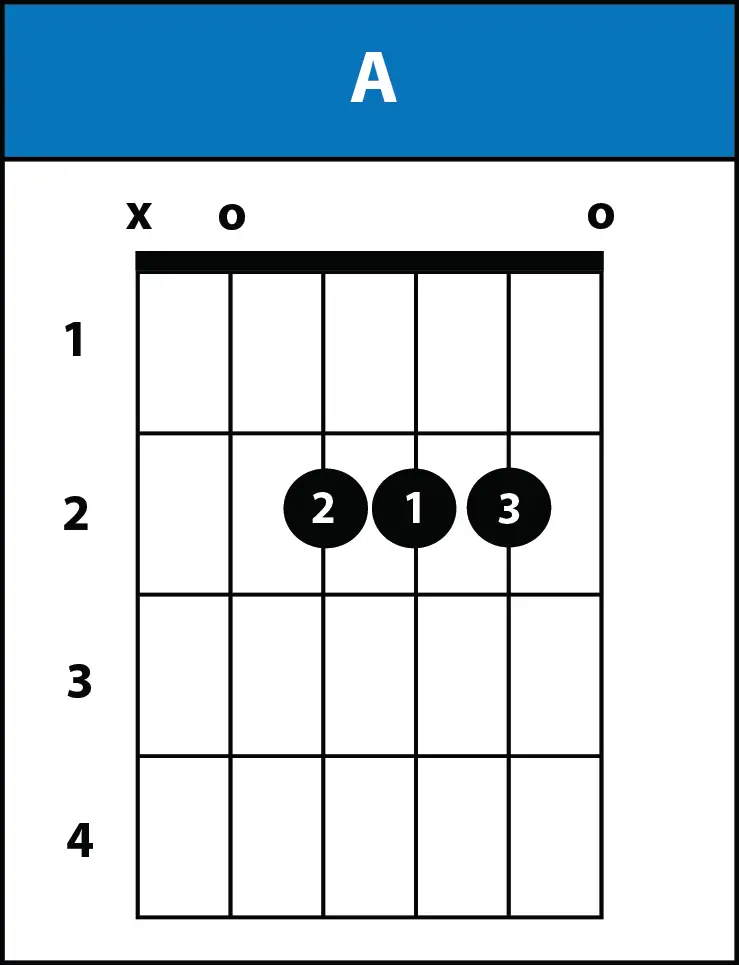
Below you can see the traditional ‘A Chord’ which is commonly used by guitarists. It is also called the ‘A Major Open’ chord.
Paying the ‘A chord’ on the guitar is quite easy. We simply need to place your Index (1st), Middle (2nd), and the Ring (3rd) finger on the second fret of the 4th, 3rd, and 2nd string respectively. That’s all. Follow the finger placement below if this sounds confusing.

FINGER POSITION FOR THE A CHORD
Here is the finger position you need in order to play the A chord.
- First, place your index (first) finger on the 2nd fret of the D (4th) string
- Then middle (second) finger on the 2nd fret of the G (3rd) string
- Finally place your ring (third) finger on the 2nd fret of the B (2nd) string
New Way Of Playing The ‘A Chord’
Besides the traditional method of fretting the ‘A Chord’ that we have learned above, there exists a new way of playing this chord on the guitar.
In this new way, the finger position is slightly different than the traditional approach. Below you can see the chord diagram and the finger position of this new method.
FINGER POSITION FOR THE A CHORD ( New Method )
- First, place your middle (second) finger on the 2nd fret of the D (4th) string
- Then, index (first) finger on the 2nd fret of the G (3rd) string
- Finally, place your ring (third) finger on the 2nd fret of the B (2nd) string
As you can see, the only thing that changed in the newer method is the finger position of the index and the middle finger. That’s all.
Note:- You can choose any of the two methods ( traditional or new ) to play the ‘A chord’. However, whichever method you choose, remember to stick to one.
It is because when we practice the finger placement of any chords over and over again, we build a certain kind of muscle memory. Now, if we mix up everything then it will create nothing but confusion.
2 Pointers You Need To Know About Playing “A Chord” On Guitar
- You may feel a bit of squeezing between fingers while playing this chord since all three fingers are placed on the same fret. But you don’t have to worry, because with some practice it will get easier and you will get used to it.
- Also, remember to place the fingers as close as possible to eachother and use your finger tips to fret (press) the notes. By doing this you will get that crystal clear sound every time you will strum the chord..
How to Strum The ‘A Chord’
There are few things you need to keep in mind when strumming the ‘A chord’.
Notice how the 6th (thickest) string is marked with ‘X’ on top. This means we have to avoid this string while strumming the ‘A chord’.
You can also see that the 5th and 1st strings are marked with ‘O’ on top. This means we will play these strings but without fretting ( pressing ) them with our fingers. These strings ( marked with ‘O’ ) are called open strings.
So, the summary is, when strumming the ‘A chord’ we only play 5 strings counting from bottom to top while skipping the 6th(thickest) string.
Now, that you know the finger position of the ‘A chord’ and what string to skip, you can go ahead and strum this chord on your guitar using a pick or your thumb.
Easy Way To Play The ‘A Chord’ On The Guitar
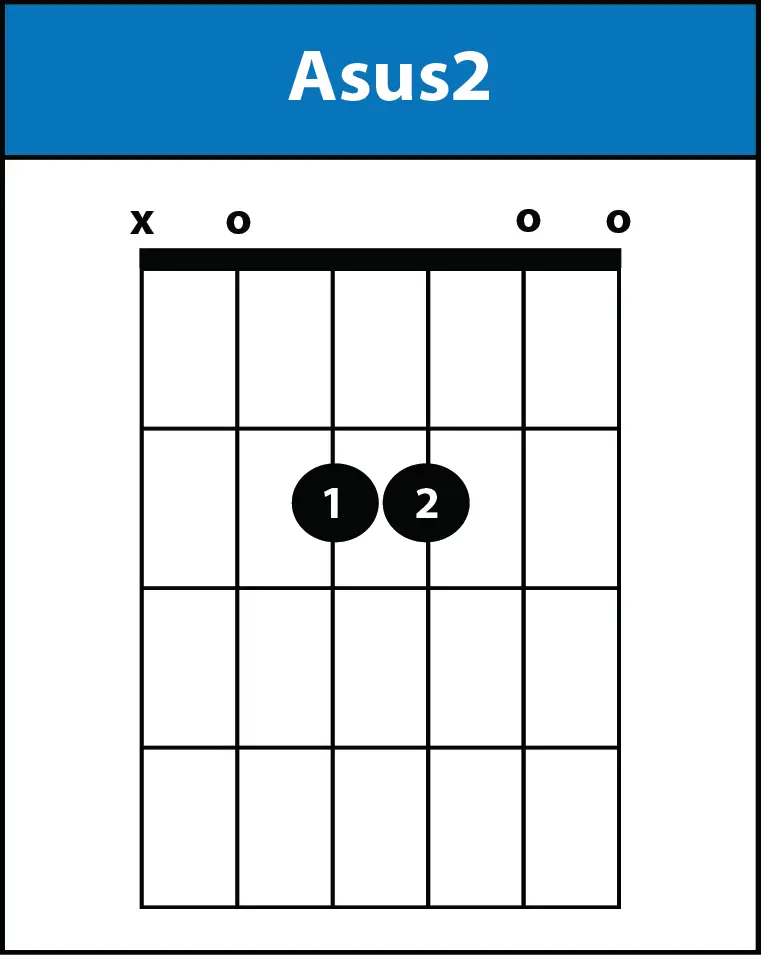
As a beginner playing the regular (traditional) ‘A chord’ can be daunting. So, as a guitar teacher myself, I always recommend starting with the easy version of the ‘A chord’ that you can see above.
It is called Asus2 ( A suspended 2nd ) and requires only two fingers ( index and middle ) to play. This chord can be found in many songs because it is easy to play and sound awesome.
FINGER POSITION FOR THE Asus2 CHORD
- Place your index finger on the 2nd fret of 4th (D) string
- And your middle finger on the 2nd fret of 3rd (G) string
Another FINGER POSITION FOR THE Asus2 CHORD
- Place your middle finger on the 2nd fret of 4th (D) string
- And your ring finger on the 2nd fret of 3rd (G) string
Note – As mentioned above, always stick to one finger position as per your ease and practice it over and over again.
‘A Chord’ Variations
There are tons of different variations of the ‘A chord’ you can play on the guitar. Each variation has a different feel and sound to it.
By learning these variations across the fretboard you will unlock a new world of musical possibility that will further help you in your guitar journey. So, let’s take a look at the most common variations of the ‘A chord’.
Variation – 1
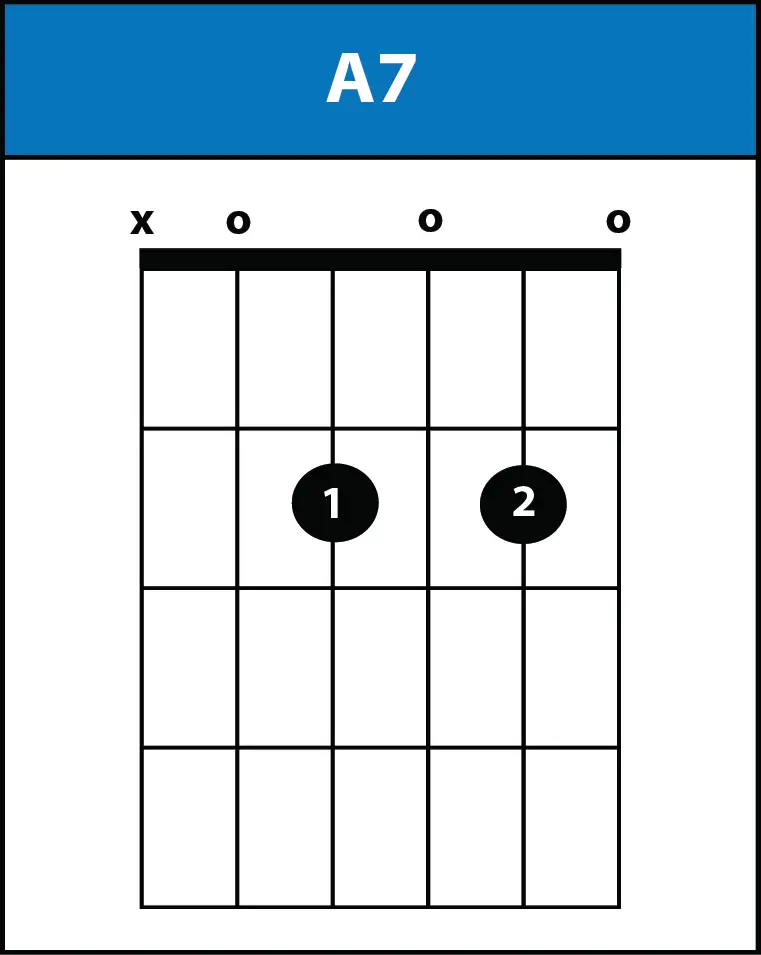
This is one of the most popular variations of ‘A Chord’. It is called the ‘A7’ chord and has a very interesting sound that works well with rock and blues music.
Playing this chord is much easier than playing the regular ‘A Chord’. All you have to do is remove your middle finger from the regular ‘A Chord’ shape. Below is the finger position you can refer to.
FINGER POSITION FOR THE A7 CHORD
- Place your index (1st) finger on the 2nd fret of the 4th (D) string
- Then your middle (2nd) finfer on the 2nd fret of the 2nd (B) string. ( You can also use 3rd finger to fret this note )
Variation – 2
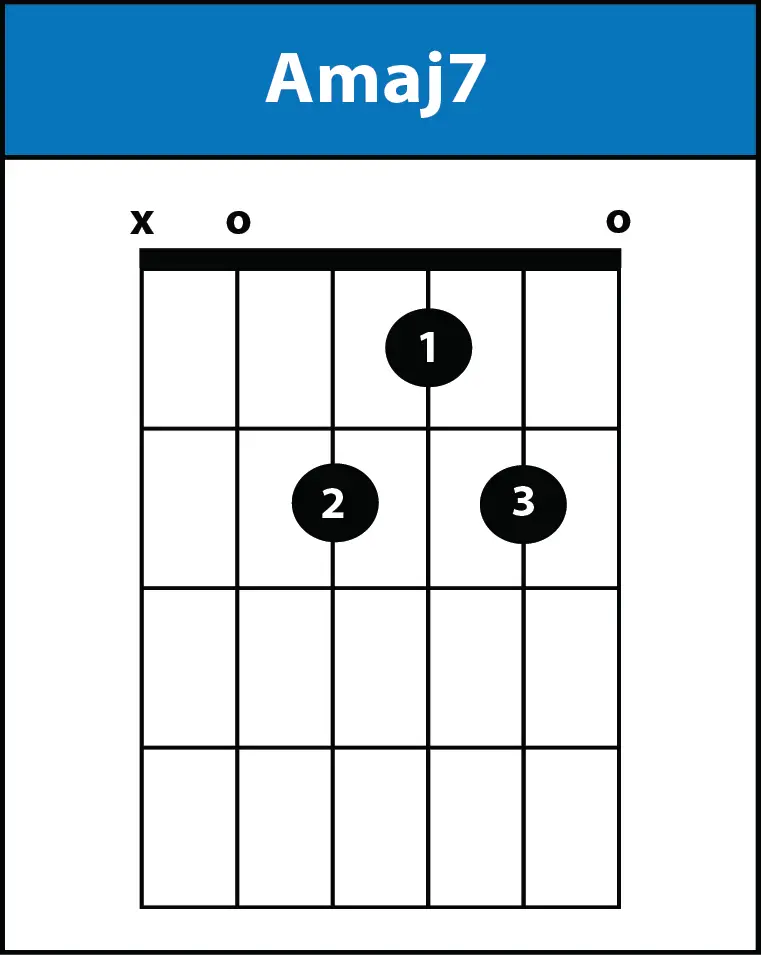
This is one more alternative way to play the ‘A guitar chord’ and it is called the ‘Amaj7’ ( A major 7 ) chord.
This chord is often used instead of the regular ‘A chord’ since it has a more mellow and jazzy feel to it. Refer to this article to learn more about Major 7th chords.
FINGER POSITION FOR THE Amaj7 CHORD
- Place your middle finger on the 2nd fret of the 4th (D) string
- Then your index finger on the 1st fret of the 3rd (G) string
- Lastly, place your ring finger on the 2nd fret of the 2nd (B) string
Variation – 3 ( Barre Chord Version )
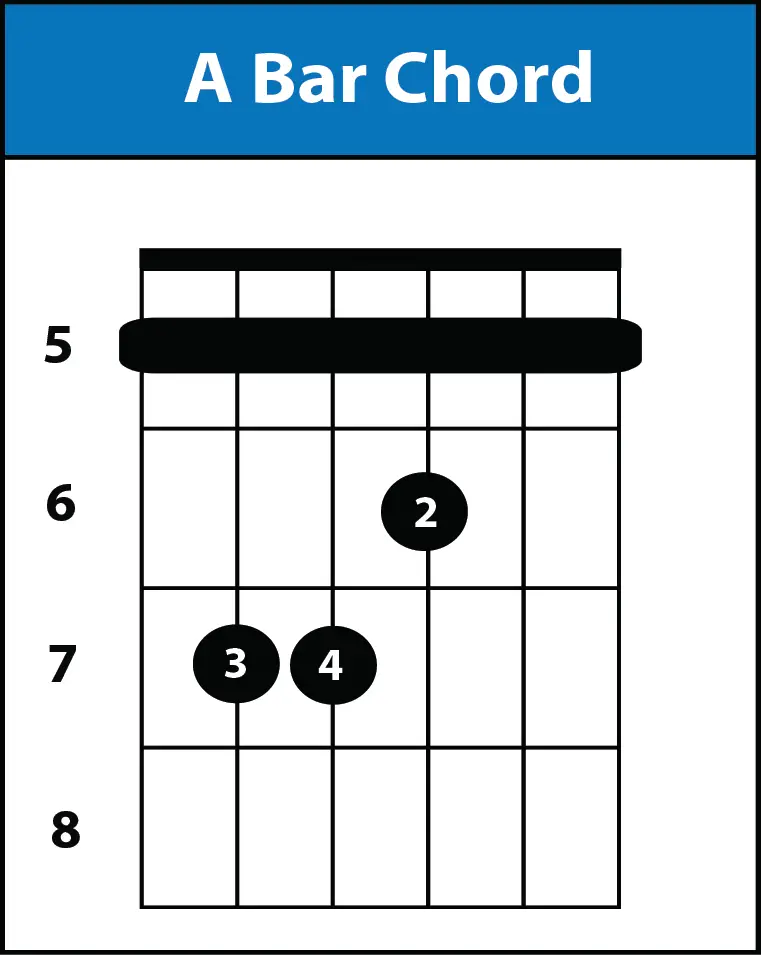
This is the regular barre chord version of the ‘A Chord’. Playing barre chords can be intimidating as a beginner because it takes that extra strength to hold it properly.
But, it is worth the effort to learn it because once you master this shape, you can slide it, up and down the fretboard to play every major chord that is available in the book. Here is a visual representation of it.
FINGER POSITION FOR A Major Barre Chord
- Place your index finger on the 5th fret and bar all the strings
- Place your middle finger on the 6th fret of the 2nd B() string
- Ring finger on the 7th fret of the 5th (A) string
- Lastly, your pinky finger on the 7th fret of the 4th (D) string
Note: Here you have to strum all the strings unlike the other variations mentioned above where you have to avoid the 6th string.
3 Important Tips and Tricks
Tip # 1 – Always remember to fret (press) the strings hard enough to get a crispier sound and to avoid muted notes ( string buzzing ).
By doing this your fingers may hurt a bit but you don’t have to worry because it is normal. As you will practice every day, your finger pads and tips will toughen up (develop calluses) and there will come a point where it will no longer hurt.
Tip # 2 – Make sure that while playing the regular ‘A Chord’ your ring finger is not touching the 1st (thinnest) string as this will stop the string to ring out.
Tip # 3 – At some point, you may feel that even after practicing too hard you are not progressing and that can be frustrating.
But let me tell you that every new guitarist goes through this phase. What matters is sticking to it and not giving up. But never be too hard on yourself.